Thursday 12 March 2015

One of the biggest highlights in 3D graphics history

One of the biggest highlights in the history of 3D graphics was the fifth era of video game consoles, which was known for its pivotal role in the video game industry's jump from 2D computer graphics to 3D computer graphics.

What distinguished this generation from the fourth generation was 3D polygonal graphics, texture mapping, 3D graphical capabilities such as lighting, Gouraud shading, anti-aliasing, texture filtering and pre-rendered computer animation. 

Gouraud shading was a major leap, with angular shading replaced with a noticeably cleaner look due to having three colours in a section instead of just one colour.

Anti-Aliasing was when a jagged aliased line had the edges blurred, to make the diagonal line look much more realistic and natural, and was a major improvement.

Every generation of consoles has improved upon the one before it, but the fifth generation really set the stage for greater improvements for 3D games, which are now the majority of games produced therefore, I see the fifth generation of consoles as being a highlight of the 3D graphics timeline.

Wednesday 11 March 2015

My inspiration to become an animator

I have always loved Lego (as everyone should) and when the first Lego Star Wars game was released in 2005, I  knew I wanted it immediately. I mean, two of my favourite things combined into a video game? It was like a dream come true. From that moment on, I would buy the next Lego licensed game as soon as it came out. I loved it because Lego was really expensive for even a medium sized set, and instead of paying $60 for a average box of Lego, I got a $60 game that was the equivalent of hundreds of dollars worth of Lego. The art style combined with the animation and sounds of the game really made it an experience.


The animations in the game really set it apart from just playing with Lego, because Lego figures couldn't move like in the game, and this is why I loved playing the game, it was only restricted by the hardware, not anything else.

This is the Linkedin profile of Jeremy Pardon, the Lead Animator of the game that made my young self start thinking: "Hey, I could make games for a living!"

Tuesday 10 March 2015

Lighting, Rendering and Compositing

Lighting is the step where you can control most of the light elements of your scenes and shots. Lighting lets you control everything from where the sun is in a shot to how much glow a light might have that’s in the scene. Lighting can add that exact feel you want a shot to portray.
Rendering is like the cousin of texturing and lighting. In the rendering step of the pipeline, you take what is seen through the camera you setup, and output the files. In order to render a scene you would first want to set up an environment, and tweak the render settings to add shadows, and adjust the quality till you get the desired end result.
The final step is compositing. Layer-based compositing represents each media object in a composite as a separate layer within a timeline, each with its own time bounds, effects, and key-frames. All the layers are stacked, one above the next, in any desired order; and the bottom layer is usually rendered as a base in the resultant image, with each higher layer being progressively rendered on top of the previously composited of layers, moving upward until all layers have been rendered into the final composite.

UV Mapping, Texturing, Rigging and Animation

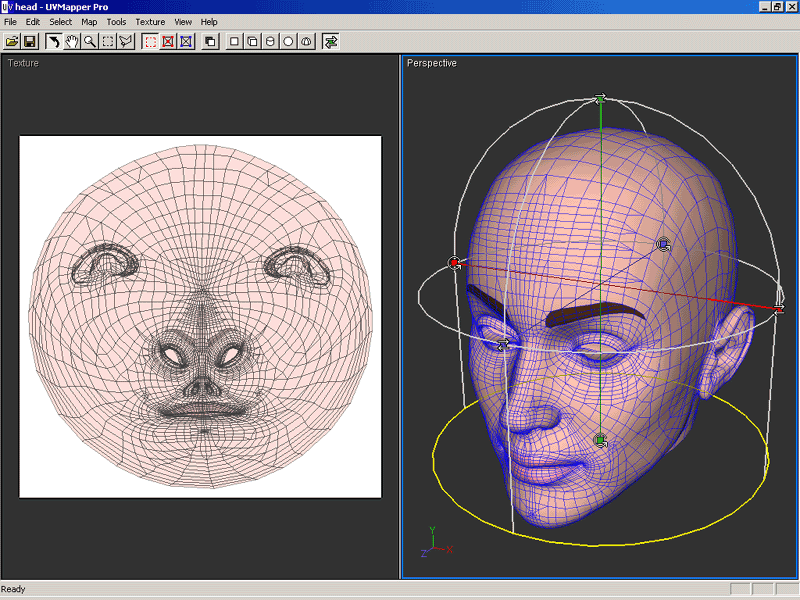
UV mapping stands for the technique used to "wrap" a 2D image texture onto a 3D mesh. "U" and "V" are the name of the axes of a plane, since "X", "Y" and "Z" are used for the coordinates in the 3D space. For example: increasing your "V" on a sphere might move you along a longitude line (north or south), while increasing your "U" might move you along a line of latitude (east or west).The purpose of this unwrapping of the coordinates is just to map these coordinates to images/pictures so that the 3D image can have a realistic looking surface with textures derived from these images.
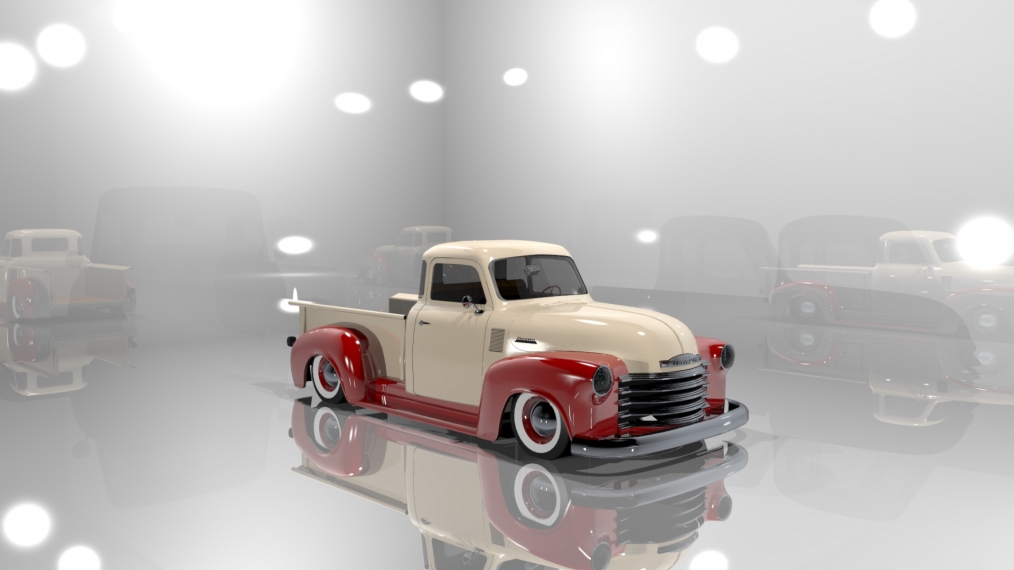
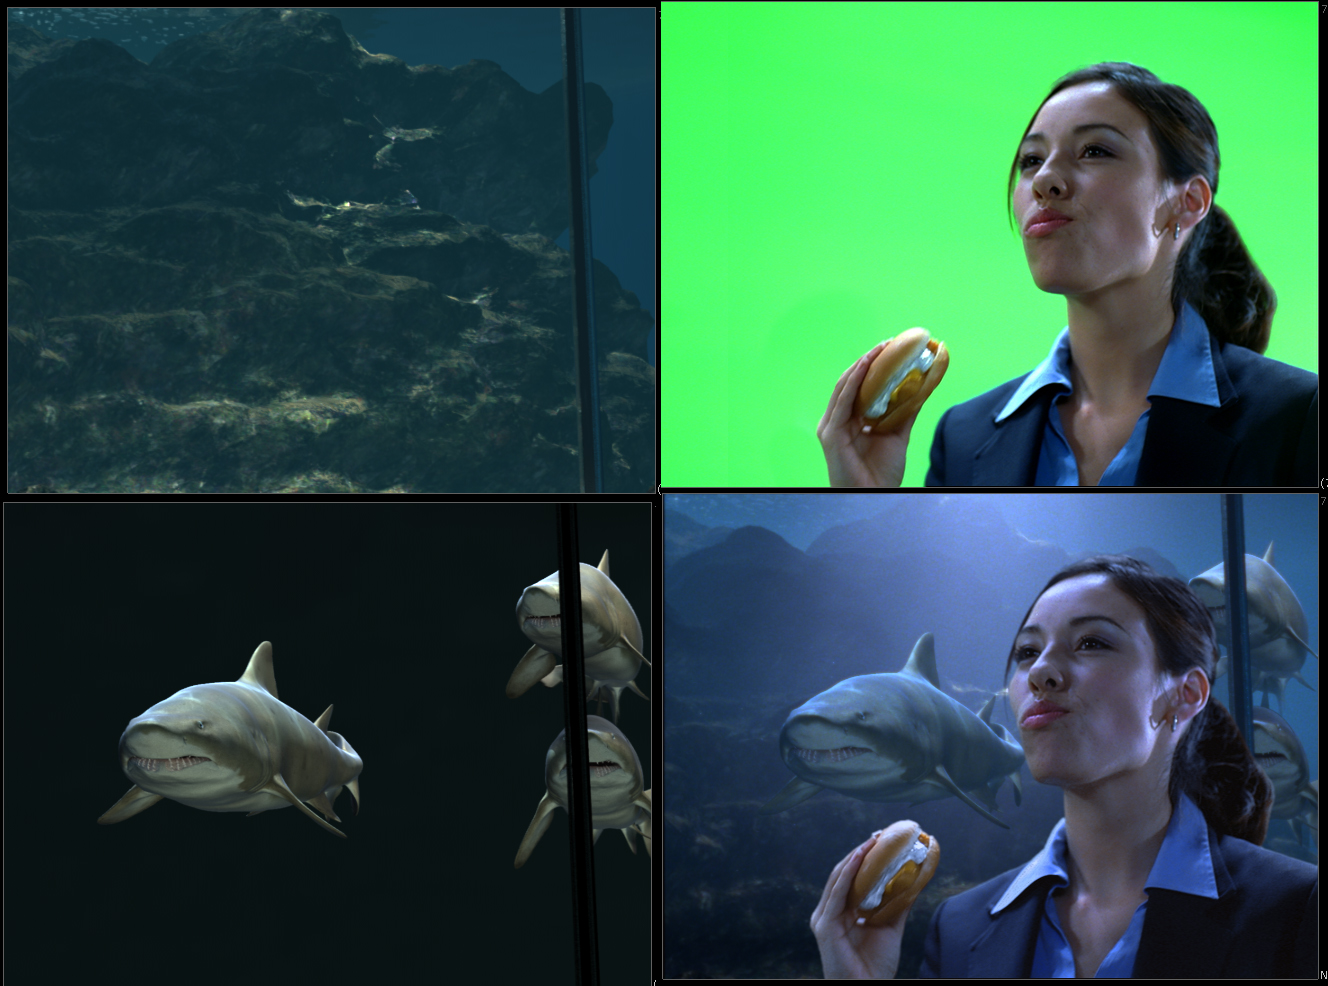
The next step is texturing, where a texture artist will work with what is referred to as a shading material that, when applied to a 3D model, gives the artists the ability to control things like colour, reflectivity, shininess, and much more. This way, what was once a 3D model with a solitary colour can be transformed into a 3D model that looks a lot more realistic with colours and materials applied.
The next step is rigging, the process in which the computer is told how the 3D models can move. For example, should a 3D model that looks like an arm be able to bend at the elbow like a realistic arm? Or can it be stretched into wacky shapes like a cartoon character’s arm? Setting this up and telling the computer the range of motion for each part of the 3D model is what the rigging process accomplishes. This is done by creating control points on the 3D model that an animator can bend and deform to create the animations.

In the animation phase, rigged assets are animated using controls to match the desired shot. A lot goes into creating seamless animations, but this is where everything comes together. Using a timeline, an animator will set movement in frames that play back as an animation.

Pre-Production and 3D Modelling

Pre-Production is the phase where the direction and scope of the project first takes form. Concepts for art style, look, sets, characters and much more are determined to help everyone and everything make it through the pipeline. This is where the concept artists are making all the base  drawings to expand upon, and to give the team a visual representation of their goal.
The next step is modelling. The initial assets are modelled from scratch using a variety of techniques to meet project requirements. The modelling stage takes all of the concepts from pre-production and starts bringing them to life. Assets are usually modelled in the style (like cartoony, realistic, 8-bit) or concepts set forth in the pre-production phase. The modelling is where the project starts to be built upon, and is usually the longest phase due to having to make most of the assets from scratch and make them in the style of the concept art.
Modellers often start with a completely empty 3D scene and build up the 3D geometry to look like anything from simple props, or environments, to complex characters. A 3D model is made up of a series of points called vertices that are connected to form a mesh. These vertices have all been meticulously placed by a 3D modeller. It’s one of the first and most important steps in the 3D pipeline because it is essentially the creation of the assets that all of the other steps in the 3D pipeline will use and build upon.

Saturday 7 March 2015

Hi, this is my first post to this blog about my research and development of  3D modelling for my university course. I hope you find it informative and easy to read